
Apple Pie 2.0
Always a work in progress

Hello!
I live for fall baking, and apple pie ranks number one on my list of nostalgic must-bakes. Apple pie was my gateway bake: the first thing I pulled out of the oven and thought, despite its imperfections, “What fun! I want to do this again.” So every September and October, apple pie returns like an old friend — sometimes dressed with a crumb top, sometimes baked in a sheet pan for a crowd, but most often as a classic double crust.
Since my book, which includes an apple pie recipe, was published back in 2020, I’ve continued to refine my apple pie game, experimenting with different techniques and ingredients. I do love that original recipe, and if I were teaching a novice pie baker it’s still where I would start. But I also wanted document the way I make apple pie now, as the next stop on an ongoing baking journey.
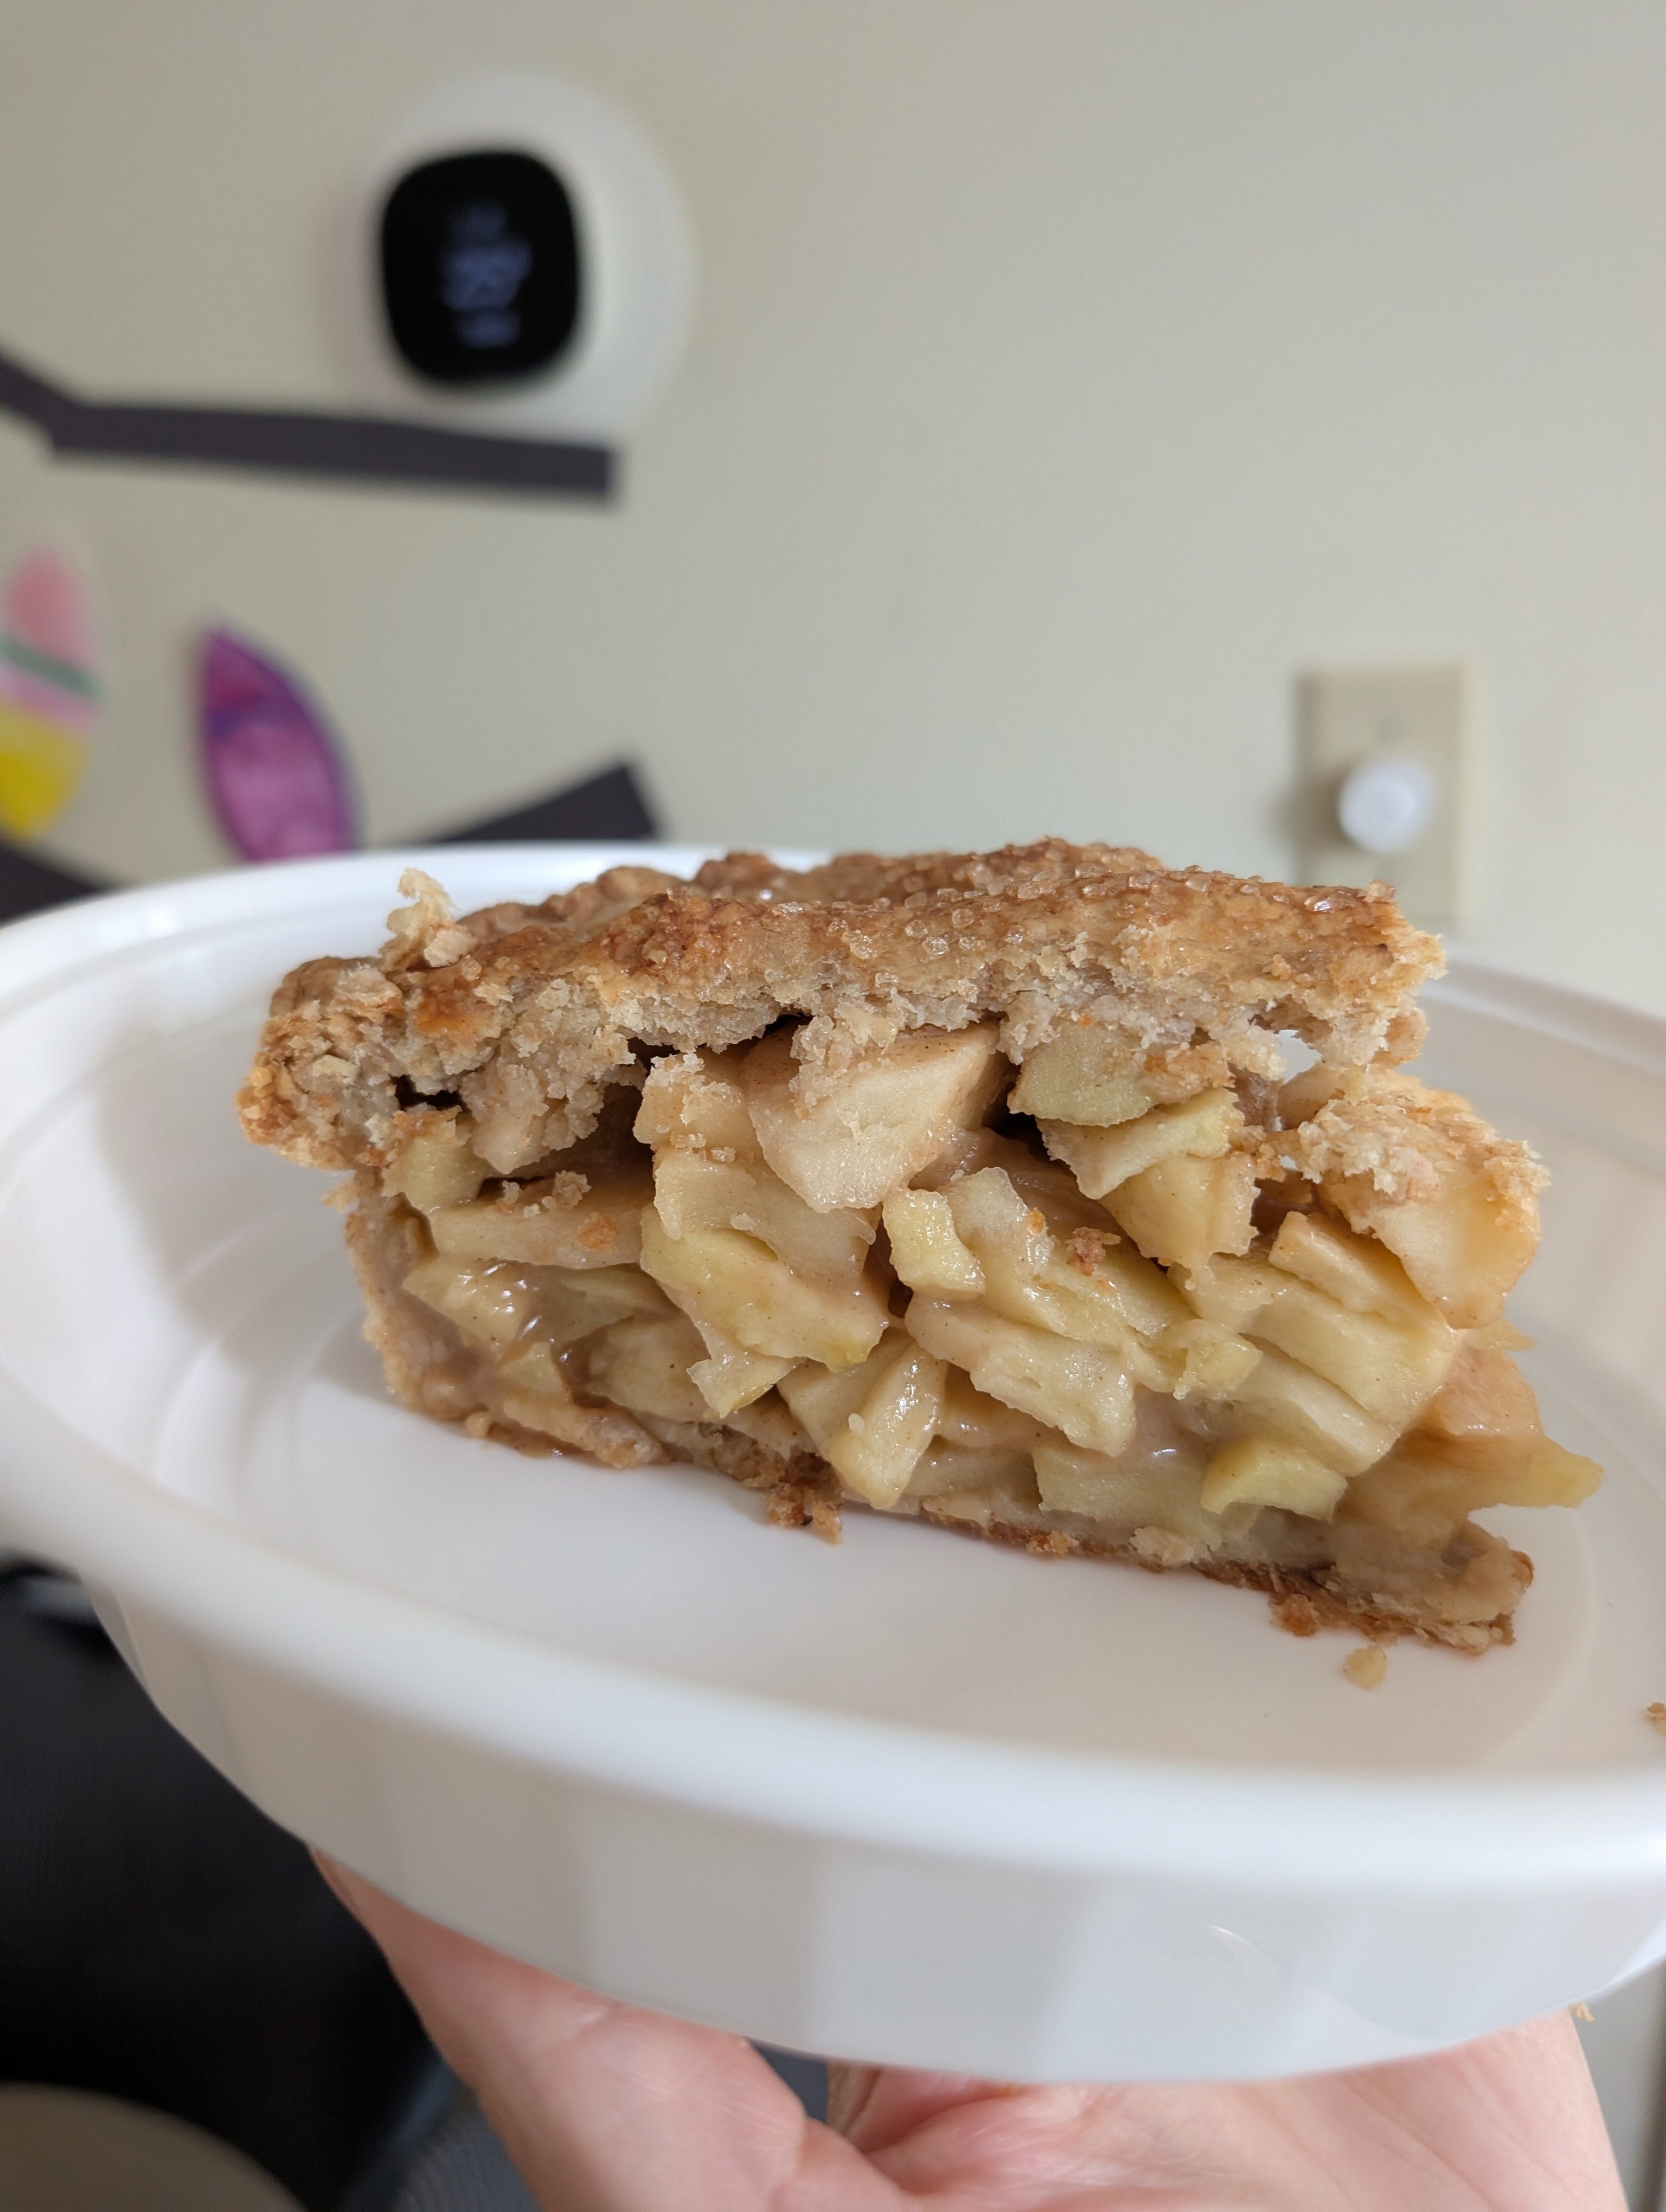
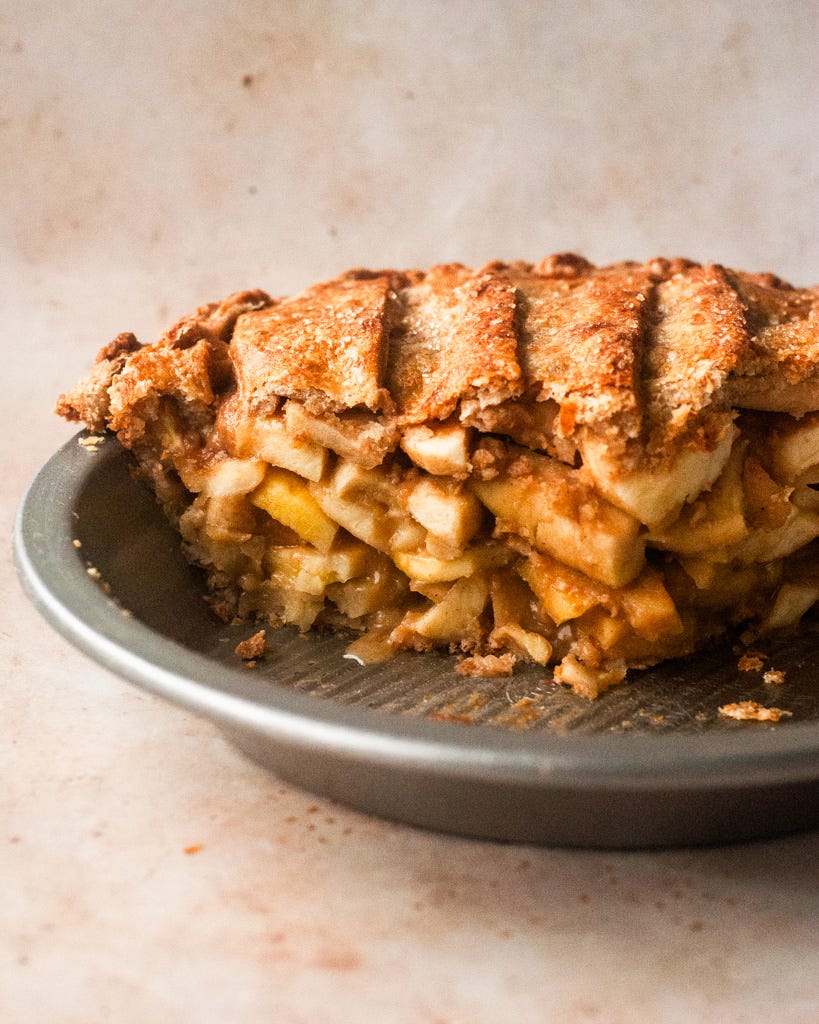
For Apple Pie 2.0, I’ve gone for a slightly sweeter (but not so sweet that it doesn’t still go great with ice cream!) and saucier filling. I like discrete yet tender apple pieces that aren’t overpowered by spice, especially if you are using seasonally fresh apples with distinctive flavor.
Let’s break down the ingredients and process.
The apples
Thousands of apple varieties exist, but not all of them belong in your apple pie. Because I want my apple filling to retain texture, I seek out varieties that hold their shape during cooking and don’t turn grainy or mushy. You can make a delicious pie with a single type of apple, but one that mixes sweet and tart varieties is more interesting to eat. My favorite tart baking apples are Mutsu and Northern Spy; for sweet I like Ambrosia and Spartan. If you live in an area known for apple growing, I encourage you to explore its unique regional varieties and develop your own baking apple mix. It’s part of your personal baking signature!
Also, while apples can be held for months in cold storage, their flavor and texture is unbeatable in early fall, when they’re perfectly in season. The difference is stark enough that I will only put in the effort to make an apple pie from scratch during this time of year (they’re a project!).
For those interested in further reading on apple varieties, here are a few articles to get you started:
The crust
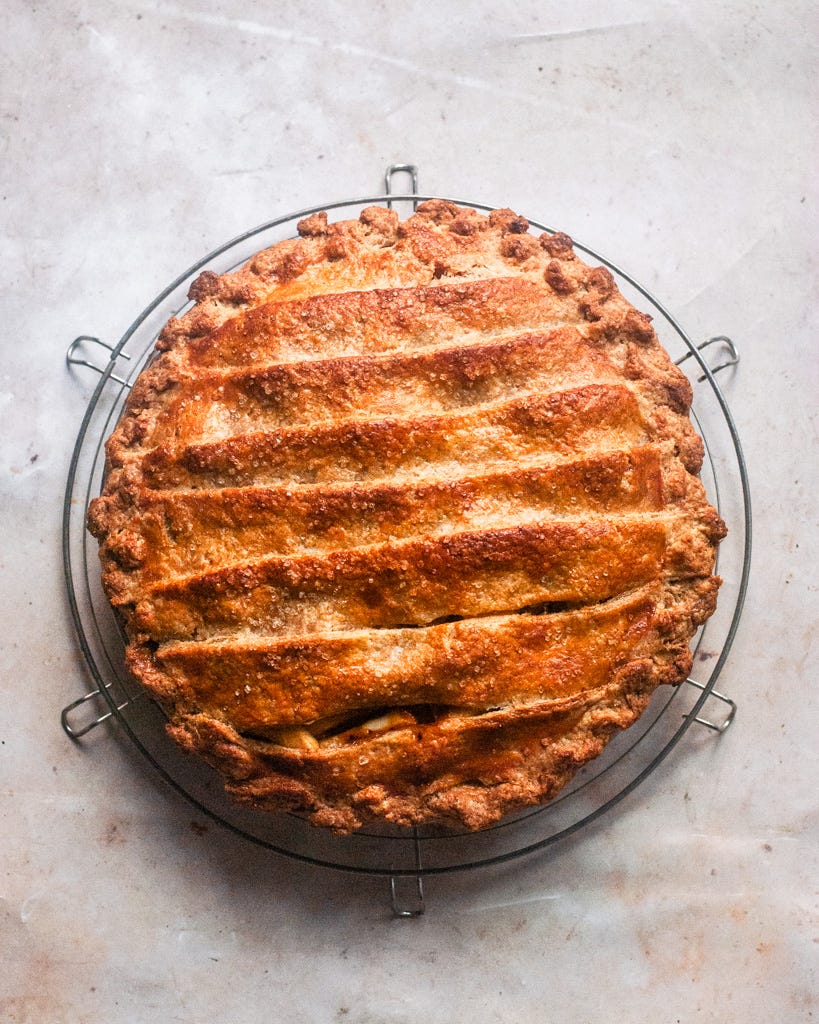
This filling is designed to go with a classic double crust. I like going with a fat lattice or shingled “slattice” (as pictured above) for a top crust that is substantial and decorative, but still easy to achieve. Your favorite pie crust will work here — I use either my classic all-butter crust or my sourdough pie crust.
The method
As in my (current) favorite blueberry pie, I mix pre-cooked and raw apples in the filling. This method creates my ideal balance of texture while offering a welcome measure of control.
To some lush sauciness to my pie, I gently pre-cook the majority of the apples in a whole spice-infused butterscotchy liquid. Take care not to boil the apples, which causes the apples to break down too much. Instead, think of it more like poaching or bathing your apples. During this process, the apples soften and release their juices into the sauce, which concentrates as the apples continue to cook. The result: extra apple-y tender fruit that won’t shrink during baking (goodbye, dreaded pie gap!). I pre-thicken the sauce with a flour-hard apple cider slurry for another dimension of apple flavor (or use plain cider / apple juice with a little apple cider vinegar, if you prefer).
Before baking, the precooked apples are mixed with raw (but separately seasoned) apples which inject freshness back into the pie. These apples will release their liquid during the bake to loosen up the pre-thickened sauce.
The bake
When making a double crusted pie, I don’t par-bake the bottom crust; so it is essential to bake the pie long enough for the bottom to fully brown. In my oven, this takes at least an hour. The top crust should be deeply golden and the juices bubbly. Baking the pie on a pre-heated baking stone or steel (or even a sheet pan) blasts the bottom of the pie with heat, quelling sogginess.
Baker’s Notes
Precooking the apples can be done several days in advance to break up the work. I usually make my crust and precook the apples on one day, then assemble and bake on the second.
For neat slices, cool your pie completely so the juices have time to thicken up. (I do confess to sometime breaking pie rules and cutting my pie when it’s sliiiiightly! just slightly! warm, as I like a little juiciness nowadays. A little messier to serve, but that’s ok.)
Kitchen scissors are my preferred tool for cutting through the top crust. I trim the top with scissors, then use a sharp knife to cut through the filling and bottom crust.
Today’s recipe is available below for paid subscribers. To access this recipe as well as all 80+ past recipes in the archive, consider upgrading to a paid subscription for $5/month. Thank you for supporting my work!
Apple Pie 2.0
Makes one 9” pie
