
Hello, friends! Welcome to the Cook Til Delicious newsletter, the space where I’m talking about the baking and baking-adjacent topics currently occupying my brain. If you’d like to receive the newsletter directly to your inbox, subscribe for free!
If you’d like to directly support the work that goes behind developing and testing all the recipes on the newsletter and the blog, consider upgrading to a paid subscibers. Paid subscribers also receive access to extra content, such as chats/Q&A’s/exclusive recipes, such as this Mile High Lemon Meringue Tart!
Thank you so much for your support.
My showstopper cake
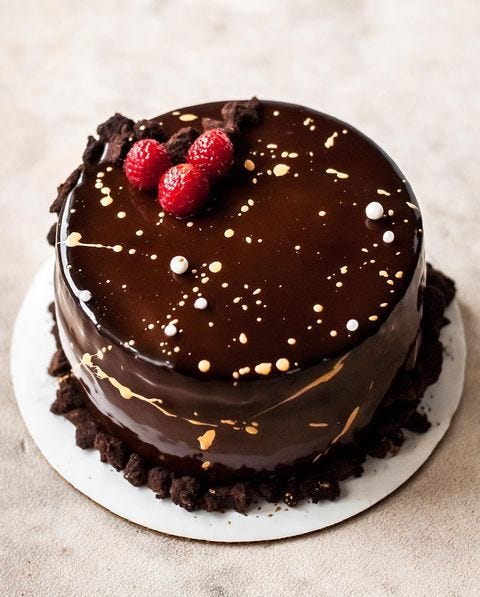
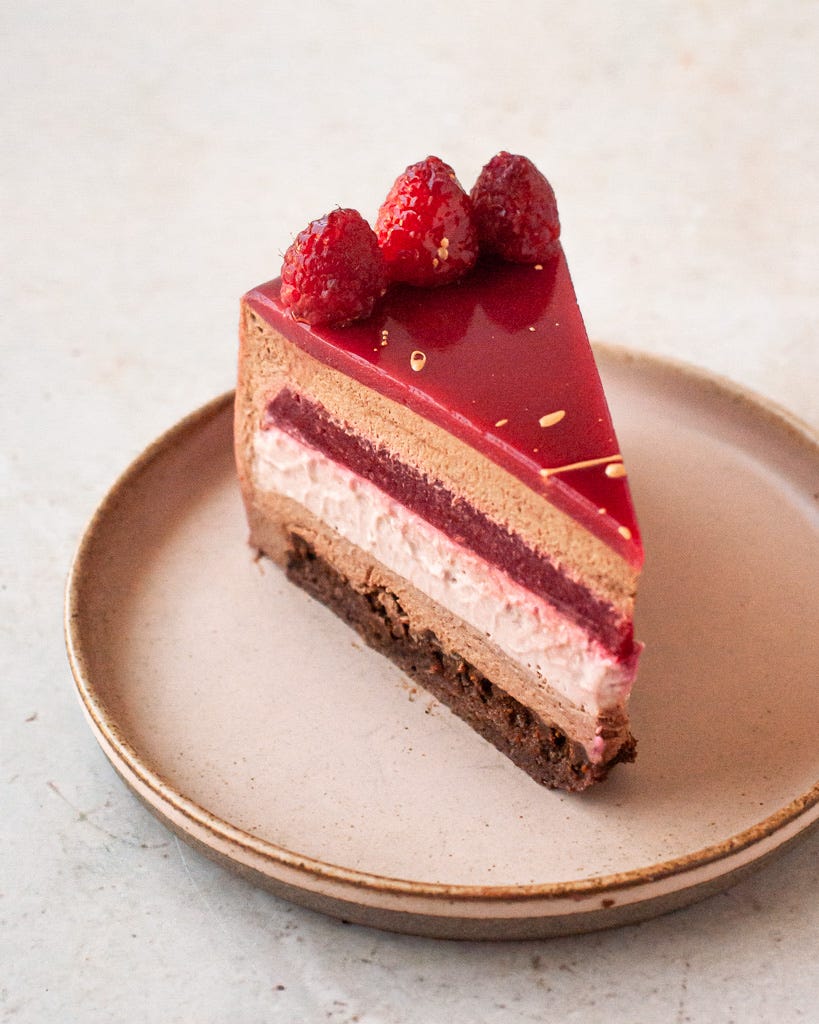
One of the all-time most popular recipes on my blog is for this chocolate raspberry mousse cake with a dark chocolate mirror glaze.
I almost didn’t post the recipe at all, because…well, first, it’s a project and I doubted anyone would make it. Paradoxically, I was also nervous because if anyone actually DID attempt it I wanted to make sure it would be worth their time. I’m not a trained pastry chef so imposter syndrome definitely rears its head whenever I set out to make and share these kinds of complicated bakes.
But in the end, I pressed publish (for future me, if for no one else) and am shocked-thrilled that people have made and loved the cake. It’s truly one of my proudest cake creations!
The tweaks
I recently re-made this cake for my husband’s birthday; and while I love the original recipe, I made a few tweaks this time around because I can’t help myself:
I made a larger cake — 9” instead 6”. The original cake was made during COVID and just for our family; this time we had a coupl extra people over and I wanted to ensure there’d be plenty to go around. Still, we finished it in 2 days. It’s not a super sweet, heavy cake. Everyone wanted seconds!
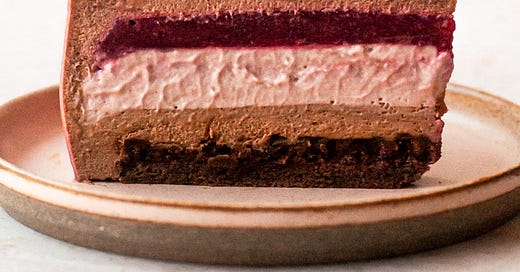
I changed the cake layer from my regular chocolate cake to a chiffon-style cake topped with a layer of chocolate crunch. Mostly, I was just curious to try a different kind of cake in this mix, plus I wanted a thin crunchy layer inside the cake (vs. on just the outside, like the original). Either works well, depending on what ingredients you have on hand. I would definitely use the chocolate crunch layer either way! You can make the crumbs from the original recipe if you want them for decoration or additional texture, but I decided not to use them this time around.
Instead of the dark chocolate mirror glaze, I used this stunning berry mirror glaze recipe from King Arthur Flour because THAT COLOR! Again, either works well, depending on the look you’re going for and what ingredients you have on hand.
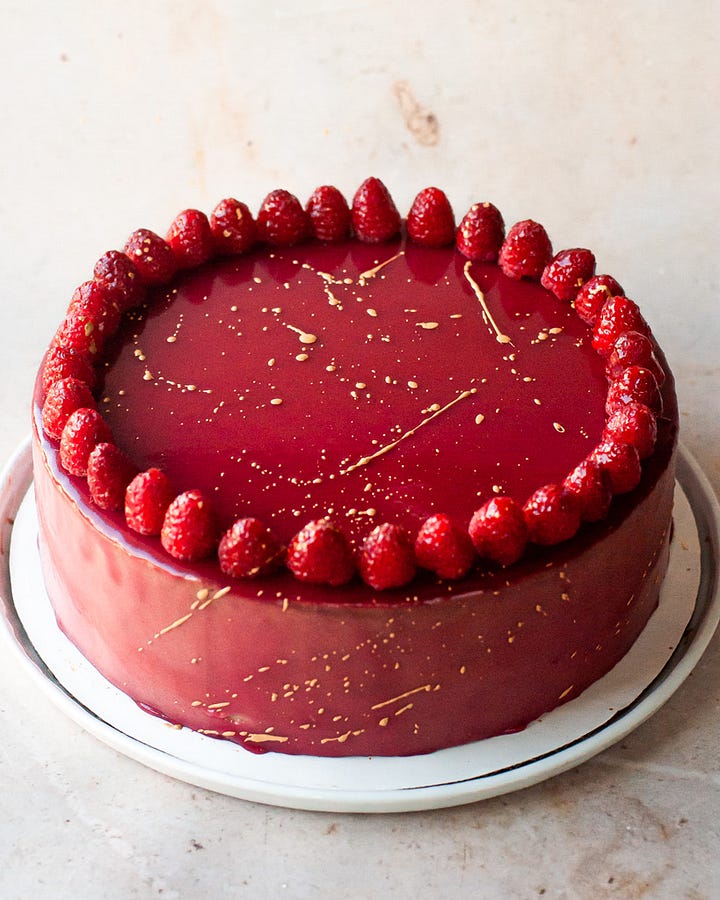
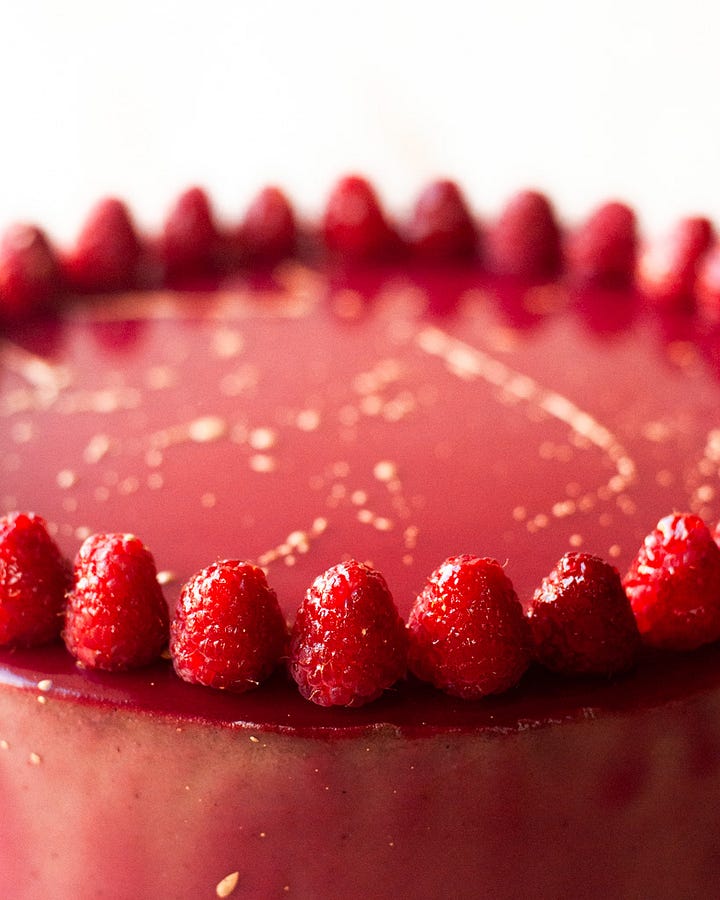
Setting up for success
For the best experience, give yourself plenty of time to assemble this cake. Personally, I break the work up over 3 days:
Day 1: Prepare gelée, crémeux, chiffon cake, and chocolate crunch. (All these elements can be prepared and frozen for up to 2 weeks, if needed.)
Day 2: Prepare dark chocolate raspberry mousse; assemble and freeze cake. (You can keep the cake frozen for up to 2 weeks.)
Day 3: Prepare glaze; glaze and decorate cake.
Special equipment list:
This is the special equipment I used to assemble this cake.
9”x3” cake ring — to assemble the cake. While you could technically use a springform pan lined with plastic wrap, you will definitely get the cleanest, sharpest results using a ring and acetate.
8” cake ring — to cut out the chiffon cake and hold the cake + crunch layer until assembly. Alternatively, you can use an 8” cake pan lined with plastic wrap.
8” cake pan — to mold and hold the gelée and crémeux layers until assembly.
10”x15” jelly roll pan — to bake the chiffon cake. You could use a 9”x13” pan and reduce the recipe by 25%.
Digital probe thermometer — to monitor the temperature of the crémeux and glaze.
Acetate — to line the cake ring, ensuring smooth sides.
High precision gram scale — for accurately measuring gelatin.
Immersion blender — for emulsifying the crémeux. Useful, but not completely necessary.
8” & 10” cake boards — I place the cake on the smaller board for glazing, and once it’s glazed I move it to the larger board (or a serving plate) for transporting and serving.
You will also need more common baking items like a kitchen scale, sheet pan (big enough to fit the cake ring), small and large offset spatulas, plastic wrap, hand or stand mixer, mixing bowls, strainers, and a saucepan.
Special ingredients:
Raspberry puree — I make my own by defrosting frozen raspberries (don’t drain them), blending them, and straining out the seeds. You can also purchase pre-made puree from some specialty baking/gourmet food stores. You’ll need 703g for this recipe (including the berry mirror glaze). If you make your own, start with ~1kg frozen berries to account for loss from straining.
Powdered gelatin — you can use something like Knox. You’ll need 37g total (a little over 5 packets). I haven’t made this using gelatin sheets but you can calculate the conversions here.
Ruby chocolate — Ruby chocolate is a special variety of chocolate that is naturally pink. It has a unique fruity flavor that pairs really well with raspberries. I use Callebaut brand. You can sometimes find bars of Ruby chocolate in grocery stores nowadays. You could substitute a 30-40% milk chocolate, but you will lose the pink color.
Feuilletine — thin, crunchy wafer flakes popular in pastry applications. You can find it online and in some specialty baking stores. In this recipe, you can substitute cornflakes or crush up some gavottes/crepes dentelles cookies.
Is it “worth it”?
Sometimes people ask me if it’s “worth it” to attempt these fancy bakes at home. This is my answer:
If your goal is to save money, then no, it’s not “worth it.”
BUT! Why do people knit a sweater, carve a bowl, plant a garden, or learn to play an instrument? Because there’s pleasure and worth in creating something beautiful with your own hands.
We’re all naturally drawn to different types of creative expression. If you’re reading this newsletter, I’m guessing that baking is one of yours. And if you don’t mind multi-element recipes and are fascinated by sharp lines, contrasting textures, and shiny surfaces, I’m quite confident you’ll enjoy making this cake! Please let me know if you try it!
Chocolate Raspberry Mousse Cake 2.0
Makes one 9”x3” cake | Raspberry gelée and dark chocolate raspberry mousse adapted from Dominique Ansel’s Everyone Can Bake; ruby raspberry crémeux adapted from Felicia Mayden; chocolate chiffon cake adapted from Nicola Lamb
Ingredients:
For the raspberry gelée (makes about 360g):
30g cold water
6g (2 tsp) powdered gelatin
280g raspberry puree
45g sugar
For the ruby-raspberry crémeux (makes about 650g):
150g whole milk, divided
4.5g (1 1/2 tsp) powdered gelatin
210g heavy cream (35%)
173g ruby chocolate, chopped
30g corn syrup
30g egg yolk
60g raspberry puree
For the chocolate chiffon cake (makes one 10”x15” sponge):
4 large eggs, separated
60g granulated sugar
27g freshly brewed coffee (or water, and add 1/2 tsp espresso powder to dry ingredients), at room temperature
47g whole milk, at room temperature
33g neutral oil
47g all-purpose flour
13g dutch-processed cocoa powder
1 1/4 tsp baking powder
1/4 tsp kosher salt
1/4 tsp cream of tartar (optional, to stabilize whites)
For the chocolate crunch:
60g feuilletine
50g dark chocolate, melted (55-70% cocoa solids)
18g neutral oil
For the dark chocolate raspberry mousse (makes about 1340g):
306g whole milk, divided (use 60g to bloom gelatin)
12.5g (4 tsp) powdered gelatin
380g dark chocolate (~60% cocoa solids)
63g raspberry puree
565g heavy cream (35%)
To finish:
Fresh raspberries
Apricot jam
Method:
For the raspberry gelée:
Prep the pan: Line an 8-inch cake pan with two criss-crossing pieces plastic wrap. Set aside.
Bloom the gelatin: Combine the cold water and gelatin in a small bowl. Stir with a spoon until the gelatin has dissolved. Allow to bloom for 5-10 minutes.
Cook the gelée: In a medium saucepan, bring the raspberry puree and sugar to a simmer over medium heat, whisking occasionally. Once the mixture comes to a simmer, remove from heat. Add the gelatin mixture and whisk to combine, making sure the gelatin completely dissolves.
Set the gelée: Pour the gelée into the prepared pan. Freeze until firm before adding crémeux, about 1 hour.
For the ruby raspberry crémeux:
Bloom the gelatin: Combine the gelatin and 25g of the milk in a small bowl. Stir with a spoon until the gelatin has dissolved. Allow to bloom for 5-10 minutes.
Make the crémeux: Place the chopped ruby chocolate in a medium heat-safe bowl and set a fine-meshed sieve over it.
Place egg yolk in a medium bowl. Heat the corn syrup in the microwave until warm. Slowly whisk into the egg yolk until smooth (warming the corn syrup helps temper the yolk).
In a small saucepan, whisk together the egg yolk and corn syrup. Whisk in the combine the remaining 125g whole milk and heavy cream. Cook over medium heat, whisking constantly, until the mixture reaches 180F on a digital thermometer. Remove from heat, then add bloomed gelatin and whisk to combine thoroughly. Strain mixture over the chocolate. Let sit for one minute, then whisk together to form a smooth emulsion. Add the raspberry puree and stir in thoroughly. (For smoothest results, blend with an immersion blender, keeping the head submerged at all times to avoid adding air to the crémeux.)
Freeze the crémeux: Pour crémeux over set raspberry gelée. Freeze uncovered until top is set, about 1 hour. Press a piece of plastic wrap on top and freeze until completely solid, at least 5 hours or overnight.
For the chocolate chiffon cake:
Prep: Preheat the oven to 350F with a rack in the middle. Line a 10”x15” jelly roll pan with parchment that overhangs the two long sides, for easy removal.
Mix the egg yolk batter: In a large bowl, whisk together the egg yolks and 20g of the sugar until the yolks are pale. Whisk in the coffee, milk, and oil until smooth.
In a small bowl, whisk together the flour, cocoa powder, baking powder, and salt. Sift (I advise not skipping the sifting, especially if your cocoa powder is clumpy) the dry ingredients into the egg yolk mixture and whisk until smooth.
Make the meringue: In a large, spotlessly clean bowl (you can either use a stand mixer with the whisk attachment or a hand mixer for this step), beat the egg whites and cream of tartar on medium-low speed until foamy. Increase the speed to medium, and whisk until soft peaks. With the mixer still on medium, slowly add the remaining 40 grams sugar. Increase the mixer speed to medium-high and beat until you have glossy, firm peaks.
Fold the batters: Using a whisk or flexible spatula, carefully fold about 1/3 of the egg whites into the egg yolk batter until just combined. Scrape this mixture over the remaining meringue and fold the two together until the batter is homogeneous and no white streaks remain. Make sure to scrape the sides and bottom of the bowl.
Scrape the batter into the prepared pan and smooth the surface with an offset spatula. Give the pan a couple raps on the counter to dislodge any big air bubbles.
Bake the cake: Bake for 18-20 minutes, or until the cake is dry and springy to the touch and doesn’t sound “wet” when you press it in the middle. Transfer to a wire rack to cool completely.
Trim the cake: Once the cake is cool, remove the parchment paper. Use an 8” cake ring to stamp out a circle of cake (or you can use an 8” cake pan to trace a circle and cut it out with a paring knife). (Freeze the rest of the cake for another project or snack on it.) Place the cake in the bottom of the 8” cake ring or in an 8” cake pan lined with criss-crossing pieces of plastic wrap. Set aside while you prepare the chocolate crunch.
For the chocolate crunch:
Place the feuilletine in a medium bowl. Use your fingers to crumble it into pea-shaped pieces.
In a small bowl, whisk together the melted chocolate and oil. Pour over the feuilletine and mix to coat thoroughly.
Spread the feuilletine mixture evenly over the chocolate cake. Refrigerate or freeze uncovered until chocolate is set, about 10-20 minutes. If proceeding directly to assembling the cake, you can keep it chilled and uncovered while you prepare the mousse. If it will be longer than a few hours, wrap tightly and freeze for up to 2 weeks.
For the dark chocolate raspberry mousse:
Note: prepare the mousse right before assembling the cake. The gelée, crémeux, and cake with crunch should all be prepared and well-chilled. I recommend preparing your cake ring before making the mousse. Also, make space in your freezer for the sheet pan to lay flat.
Bloom the gelatin: Combine the gelatin and 60g whole milk in a small bowl. Stir until the gelatin has dissolved. Set aside to bloom for 5-10 minutes.
Prep the chocolate: Place the chopped dark chocolate in a medium bowl and set a fine-meshed sieve over it.
Heat the milk: Put the remaining 246g milk in a small saucepan. Heat over medium heat until steaming, stirring occasionally. Once steaming, remove from heat and whisk in the bloomed gelatin mixture.
Make the ganache: Strain over the chopped chocolate. Let mixture sit, without stirring, for 30 seconds; then whisk until the chocolate has melted and the mixture is smooth. Add the raspberry puree and whisk until completely combined. Let cool at room temperature while you whip the cream (you want the ganache to be slightly warm when combining with the cream).
Whip the cream: Place the cold heavy cream in a large bowl (or in the bowl of a stand mixture fitted with the whisk attachment). Whisk on medium speed until soft peaks form.
Fold the ganache into the cream: Slowly pour the ganache into the whipped cream a little at a time, gently folding it in with a spatula until just combined. Transfer to a piping bag and use immediately.
Assemble the cake:
Note: I recommend preparing the cake ring before making the dark chocolate raspberry mousse.
Line the inside of a 9x3 cake ring with acetate and wrap the bottom with a layer of plastic wrap (this will keep the mousse from leaking out the sides). Place on a sheet pan. Make sure you have space in your freezer where the sheet pan can fit flat so the cake can freeze properly.
Prepare the dark chocolate raspberry mousse (see above).
Place the cake in the center of the ring, crunch side up.
Pipe mousse around the edge of the cake and use an offset spatula or spoon to spread mousse up the sides of the acetate (this ensures there will be no air bubbles on the outside of the cake). Pipe about 3/4” of mousse on top of the cake. Lightly tap the pan to ensure there are no air bubbles and smooth the top with an offset spatula. Set the gelée-crémeux layer on top of the mousse, geléee-side up. Gently press into the mousse until the mousse comes up the edge of the crémeux. Pipe mousse around the edge of the gelée-crémeux, then pipe in mousse to fill the remainder of the mold. Tap pan again to remove any air bubbles. Smooth the top so it is perfectly flush with the top of the mold. (You may have a little mousse leftover — consider it a baker’s treat!)
Transfer the sheet pan to the freezer. Freeze until solid, at least 3 hours or overnight.
For the berry mirror glaze:
Note: prepare glaze about 1-2 hours before you want to glaze the cake, and at least 4 hours before serving. After glazing, the cake will still need fully defrost in the fridge before serving.
Follow the instructions for preparing the berry mirror glaze. You want to use the glaze when it is around 88-90F.
Glaze and decorate the cake:
At least 4 hours before serving, unmold and glaze the cake. Line a sheet pan with plastic wrap and set a sturdy plastic container or an overturned 6” cake pan on top. (You want something smaller than the diameter of the cake so the glaze will drip off properly, but make sure it’s level and sturdy.) Take the cake out of the freezer and remove the cake ring. Place the cake on an 8″ cake board and remove the acetate. Double check the glaze is at working temperature — 88-90F — before glazing. If not, wrap cake tightly in plastic and keep in freezer until ready to glaze — the cake must be frozen and not starting to melt when the glaze is applied.
Pour the glaze over the cake, starting in the center and slowly moving outward in a circular motion. If everything is at the proper temperature, the glaze should flow down and cling to the sides of the cake. If any spots on the sides aren’t covered, carefully dribble glaze down the edge above that spot. Let the glaze set for a couple of minutes, then use an offset spatula to cut off any stray drips at the base of the cake.
Use a cake lifter or a couple of offset spatulas to move the glazed cake onto a serving plate or 10” cake board. (The extra glaze can be refrigerated in an airtight container for up to a week or frozen; rewarm before using.)
Decorate with edible paint and raspberries at this point if desired (berries will adhere better when the glaze is still a little sticky). For the paint spatters, start by placing the cake on a newspaper-lined surface (it’s messy!). I like to saturate a small brush with edible paint and then alternate with flicking just the bristles at the cake (do it from ~6” back so you don’t accidentally flick your cake…sad) and flicking my entire wrist towards the cake (like you’re using a ping-pong paddle). The former will give you speckles and the latter longer streaks. Practice on a plate or parchment paper first, if you’re nervous!
Before placing the raspberries on the cake, brush them with some warmed and strained apricot jam to give them some shine and prolong their freshness. I opted for a simple ring around the edge but do whatever you like!
Transfer cake to the refrigerator to thaw completely before serving (at least 2 hours, or up to a couple days). For clean cuts, dip a sharp, thin chef’s knife in hot water and dry the blade before each slice. Refrigerate leftovers in an airtight container for several days. Note: the color from gelée may start to bleed into the lower layers after a day or two, but it will still taste wonderful!




I made this cake last week and it was amazing! I used my old chiffon recipe but made (almost) everything else as in the instructions. The only changes were that I scaled it to a 10 inch cake and that I used glucose instead of corn syrup. And I also didn't do the mirror glaze.
Thank you for the recipe! Here are the pictures of how it turned out https://imgur.com/a/9HTWDFm
Can you use fresh raspberries?