


Dutchies and Apple Fritters
Starting 2024 on a fry note

Hello!
Despite living in Canada for about a decade, I have yet to taste some iconic Canadian foods. The Dutchie, a yeast-raised, raisin-studded, square-shaped doughnut, is one such item. It was popularized by Tim Horton’s, the beloved Canadian coffeehouse chain, as one of the two original baked goods on the menu. Beyond this, I haven’t been able to find much information on the Dutchie’s invention. There’s likely some connection to the Dutch doughnut oliebollen; though oliebollen are made from a wetter, more batter-like dough compared to the enriched yeast bread dough that forms the base for Dutchies.
Timmy’s removed the Dutchie from production many years ago, citing low popularity; but mention it among a group of Canadians and you’ll likely find at least a couple people who mourn its loss. My husband, a member of the pro-Dutchie camp, has suggested several times that I should try making some.
The time has come.
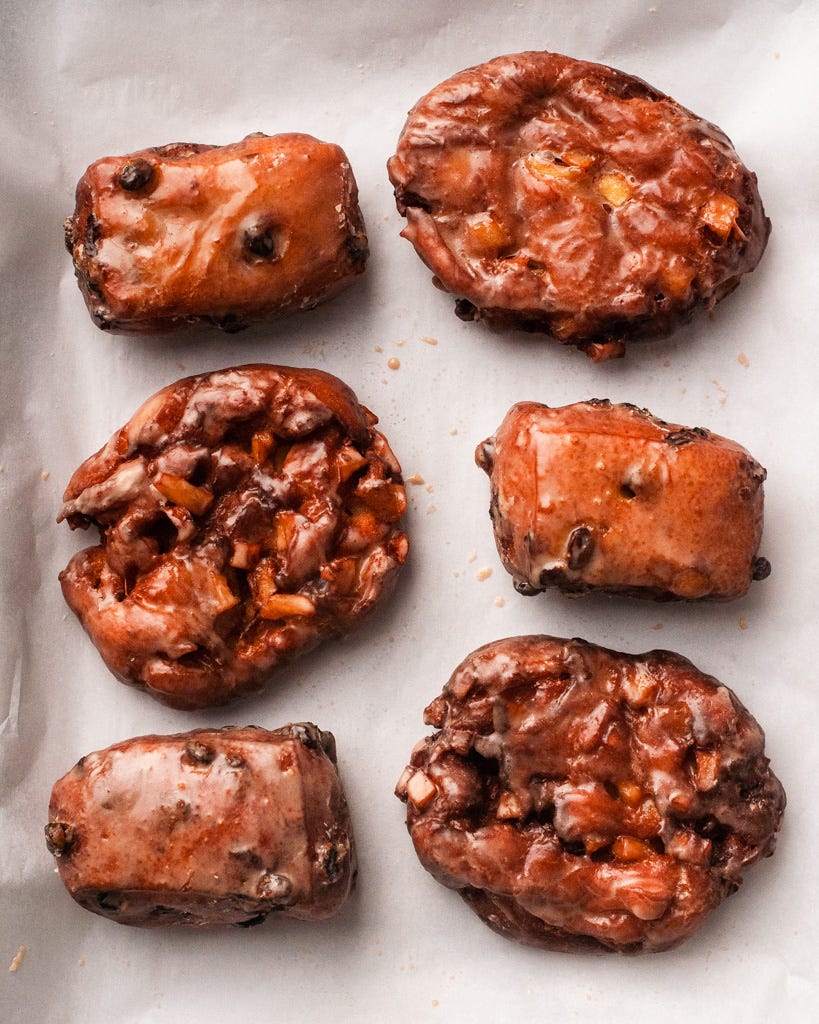
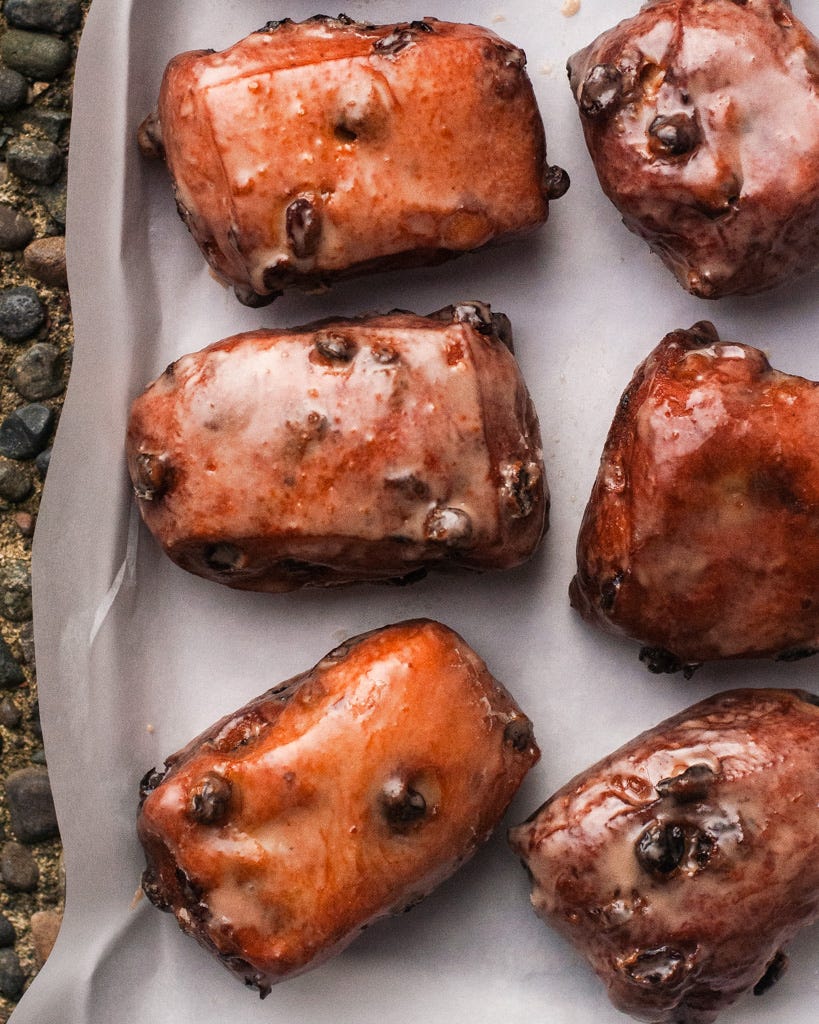
My spin on the Dutchie starts with a soft yeasted enriched dough flavored with buttermilk, brown sugar, nutmeg (THE doughnut spice), a hint of whole wheat, and sourdough. It gets loaded with plump raisins, then finished with a thin crackly sheen of cinnamon and vanilla-spiked glaze. They are airy and chewy, with so much flavor in every bite. YUM.
I still haven’t tasted a Timmy’s Dutchie (though it looks like I’ll get my chance soon!), so I can’t honestly speak to how closely these resemble the originals. My goals were simply to make an A+ raisin doughnut that would evoke some sense of nostalgia for those who grew up with Dutchies; and to create a delicious treat for the rest of us. According to my informal poll of both Canadians and non-Canadians, both these goals have been met; so I’m happy to share the resulting recipe with you.
For paid subscribers, I’m sharing how to turn the same base dough into another doughnut shop favorite: the apple fritter. Due to its unique shaping style, the fritters eat very differently from the Dutchies: they’re crispier and craggier, thanks to the larger surface area exposed to the hot oil. Don’t make me choose a favorite: make a double batch of dough and enjoy them both!
Note: Coincidentally, Tim Hortons is celebrating its 60th anniversary in 2024; and wouldn’t you know it — the first two baked goods on its original menu were the Dutchie and apple fritter. That I’m sharing my homemade versions of both these treats to start the year is completely seredipitous, not due to any excellent planning of my own!
Baker’s Notes:
I love the taste of freshly grated nutmeg (always freshly grated! It really makes a difference) and consider it crucial to achieving an iconic doughnut shop flavor. I’m pretty heavy handed with it, but feel free to use less if you’re not a nutmeg lover.
Maintaining the proper oil temperature throughout deep frying is key to making homemade doughnuts that are perfectly golden and cooked through. If the temperature is too low, the doughnuts will be pale and absorb too much grease. Too high and they’ll over-brown before the center is completely cooked. An instant-read digital thermometer is your friend.
I like my doughnuts coated completely in a thin, translucent layer of glaze, so I dip them while still a bit warm. For a thicker coat, let the doughnuts cool completely (you may need additional glaze as well).
Dutchies
Makes 9 dutchies
Ingredients:
For the dough:
125g buttermilk, at room temperature
50g 100% hydration sourdough starter, at peak1
40g light brown sugar
5g 1 1/4 tsp) kosher salt
5g instant yeast
40g whole egg, at room temperature
6g (1 1/2 tsp) vanilla extract
Freshly grated nutmeg (I use ~1/3 of a whole nut for a punchy nutmeg flavor)
125g bread flour
90g all purpose flour
35g whole wheat or spelt flour
40g unsalted butter, at room temperature
125g raisins, soaked in warm water for at least 15 minutes and drained and patted dry
For frying:
~1 quart/liter neutral oil (such as canola)
For the glaze:
180g icing/confectioner’s sugar, sifted
1g (1/4 tsp) kosher salt
1/2 tsp ground cinnamon
45g hot water, just off the boil
1 tsp vanilla extract
Method:
Mix the dough: In the bowl of a stand mixer fitted with the dough hook attachment (or in a large bowl, by hand), mix together the buttermilk, starter, sugar, salt, instant yeast, egg, and vanilla extract until smooth. Add the flours and stir until combined. Mix on medium-low speed for 3-5 minutes, or until smooth and moderately developed.
With the mixer on low, add the butter in two portions, waiting until the first portion is incorporated before adding the rest. Once all the butter has been added, mix on medium-low until dough is very smooth and passes the windowpane test, about 5 minutes. Add the raisins and mix just until evenly incorporated (I find it easiest to do this by hand).
Shape dough into a smooth ball and transfer to an oiled container. Cover and let rise at room temperature until expanded by about a third, 30-45 minutes, then refrigerate for at least 6 hours and up to 24.
Shape and proof: Cut nine 3”x3” parchment squares and place on a large sheet tray.
Transfer dough to a clean surface and gently roll or press into a generous 1/2” thick square measuring about 8”x8”. Use a sharp chef’s knife or bench scraper to cut the dough square into a 3x3 grid for a total of 9 dutchies. Transfer each dutchie to a parchment square. Cover with lightly oiled plastic wrap.
Proof in a warm spot until the doughnuts are roughly doubled in size, about 60-90 minutes; they should look puffy and marshmallowy. (I like to place the tray in the oven with light on with a pan of hot water on the oven floor.)
Fry the Dutchies: When the doughnuts are almost ready, heat the oil to 360F (I recommend using a clip on instant-read thermometer) in a deep, heavy bottomed saucepan or dutch oven. You want about 3” of oil; do not fill your pot more than half full. Prepare a rack set over a baking sheet where you can place your freshly fried doughnuts.
Carefully place the Dutchies, still on their parchment squares, into the oil 2 or 3 at a time. The parchment squares will release from the dough after a few seconds; carefully remove them with tongs or chopsticks.
Fry the Dutchies for about 3 minutes total, flipping halfway through. Monitor the oil temperature and adjust the heat as necessary to keep it around 350F. Use a slotted spoon to remove from the oil and transfer to the prepared rack.
Glaze the Dutchies: Once all the Dutchies have been fried and have cooled for about five minutes, whisk together all the glaze ingredients in a medium bowl. It will be quite thin. Dip the Dutchies in the glaze one at a time, turning to coat; then place back on the rack to set. (I find this is just enough glaze to coat all the dutchies, though you may need to use a brush or clean finger to completely cover the last one. The glaze is thin enough that it still looks fine.) Let the glaze set for about 10 minutes, then enjoy while fresh — preferably with a large mug of black coffee. Doughnuts are best enjoyed the day they are made.
Want an extra dose of golden glazed deliciousness? My apple fritter recipe below is an exclusive for paid subscribers. This newsletter is entirely reader-funded; subscriptions help offset ingredient costs and fund the research, testing, and writing that goes behind each recipe. Thank you for your support!
Keep reading with a 7-day free trial
Subscribe to Cook Til Delicious to keep reading this post and get 7 days of free access to the full post archives.