What are your baking obsessions? I’ve had many over the years, but an enduring one is Asian style fluffy sponge/chiffon cakes. They just hit all the points for me:
Nostalgic — Whether as a thick wedge, a paper wrapped cupcake, or within a whipped cream fruit cake or swiss roll, it’s the type of cake I ate most often growing up as second generation Asian American kid.
Simple pantry ingredients — For a basic chiffon, all the ingredients are easy to source. I typically have everything stocked.
Quick to assemble — These cakes use liquid fats like oil or melted butter, so no need to think ahead and temper ingredients. I also use eggs cold from the fridge (gasp!) — more on that later.
Not too sweet — Compared to Western style chiffon cakes, Asian chiffons use less sugar and are often enjoyed unadorned. I think they’re appropriate pretty much any time — breakfast, snack, dessert!
Sponge, chiffon, what’s the difference?
Here in North America, “sponge cake” is used to categorize cakes leavened primarily by the foaming method — that is, whipped eggs, either whole or separated. Genoise, joconde, angel food cake, chiffon, daffodil, hot milk — all of these cakes fall under the sponge or foam cake umbrella. Sponge cakes may or may not include chemical leaveners such as baking powder and baking soda.
Chiffon cakes use the separated egg method. Egg yolks are mixed with the fats/flour/liquid, then the whites are whipped into a meringue and folded into the yolk batter to aerate it. Western chiffon cakes usually include a chemical leavener, while Asian style chiffons may or may not. Compared to most other sponge cakes, chiffon cakes contain a higher proportion of fat and liquid, making them moist and rich enough to eat plain.
Asian chiffon techniques
If you read or watch many Asian chiffon recipes, you may notice several techniques that differ from typical Western recipes.1 In my own baking journey, I’ve experimented with many of them and some now hold a permanent place in my workflow. Here’s a quick rundown:
Cold egg whites and the quality of meringue: A lot of Asian (particularly Japanese) chiffon recipes call for cold or even half frozen egg whites for the meringue. I believe this is to prolong the stability of the egg whites and promote a stable meringue with minimal sugar and often no “safeguards” like cream of tartar. While egg whites at room temperature will beat up faster and loftier, Asian recipes emphasize the quality of the air bubble size in the meringue over the overall volume. Meringues are typically beaten at lower speeds for longer, which builds up a strong network of air bubbles that can better withstand the folding process.
I’ve been going the cold egg white route for the last couple years plus now, and I’m not going back! My chiffons haven’t suffered at all, though I’d attribute this more to practice than the temperature of my egg whites. Mostly I love the convenience of not having to wait for whites to come to room temp. Also, these days I’m usually multitasking by beating my meringue in the Kitchenaid while working on my yolk batter. Starting with cold whites buys me a bit more time.
I do, however, like the insurance of a little cream of tartar so I always include a pinch in my meringues.
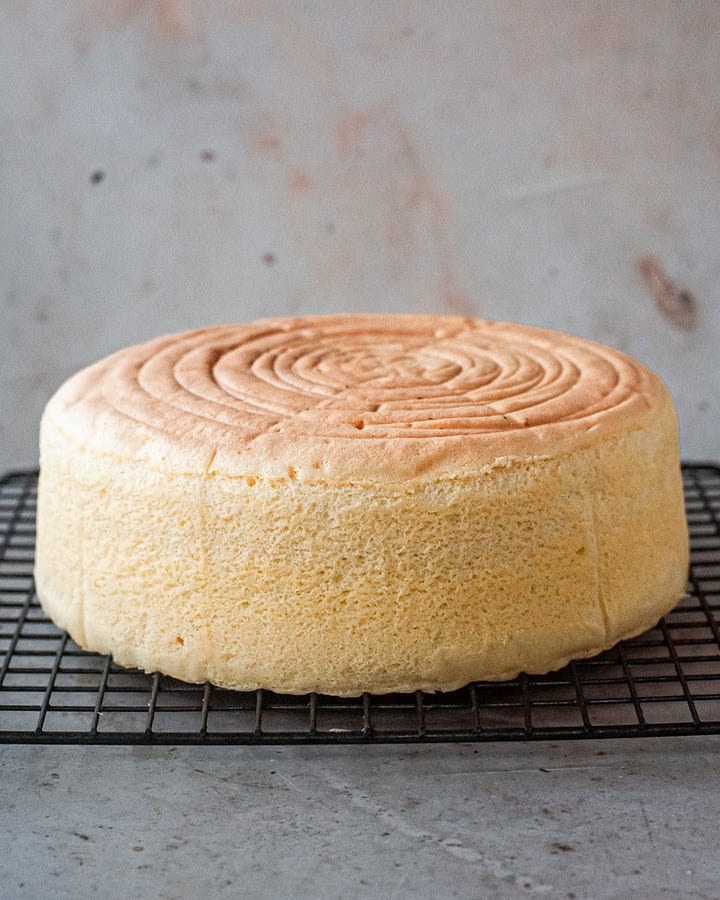
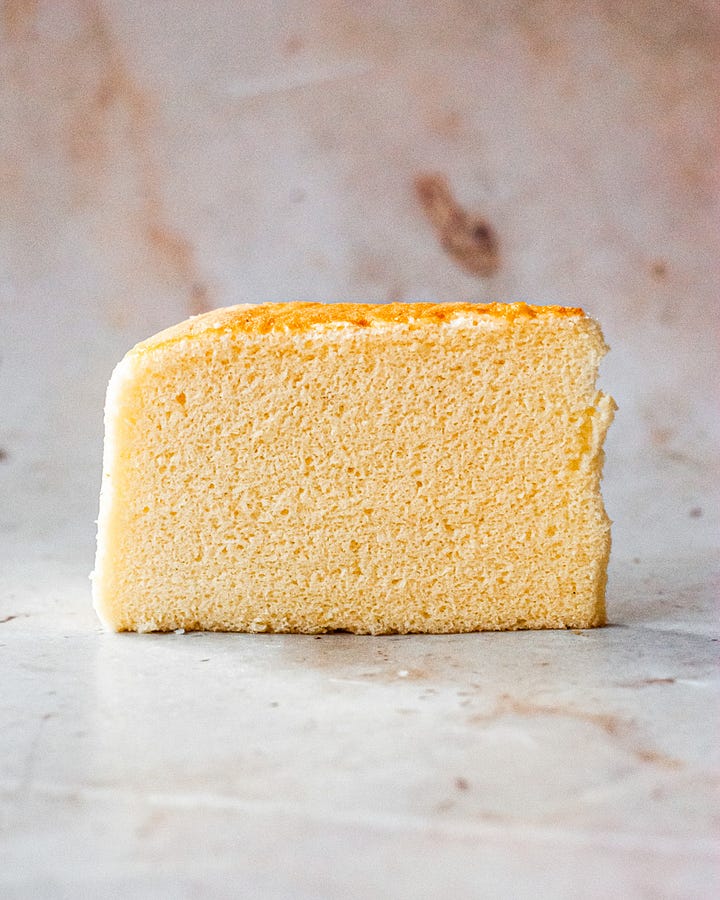
Dry bake vs. water bath: There is a whole subcategory of Asian chiffon cakes that are baked using a water bath (sometimes referred to as “steam bake”). Using a water bath helps regulate the temperature in the oven and allows the cake to bake gently and slowly, resulting in an ultra-smooth “cottony” texture. When fresh out of the oven, these cakes are delightfully “jiggly” and it’s pretty much required that you wobble the cake on camera while it’s still warm. (The cake loses its jiggle as it cools.) Perhaps the most internet-famous water bath chiffon is the Japanese cotton cheesecake. Ogura (from Malaysia) and Taiwanese castella cakes (not to be confused with Japanese castella cakes) are two other chiffon styles that are commonly baked in a water bath. Additionally, water-bath chiffons are usually baked in one-piece round or square baking pans instead of the two-piece tube pan commonly used for dry-baked chiffons.


If you’re a fan of very light, smooth cakes and you’ve never tried a water-bath style chiffon, add it to your baking list now! They can take some practice to nail — ideally they should not crack on top and the sides should be straight and smooth, without wrinkles or a “waist” where the middle shrinks inward. The texture should be uniform from top to bottom with no big air pockets or bubbles. But once you figure these cakes out, they are incredibly satisfying to make and eat.
**Paid subscribers will get a bonus water bath chiffon recipe at the end of this post!**
Chemical leaveners: All the Western chiffon recipes I’ve read call for chemical leaveners (usually baking powder), the common reasoning being that it’s helpful for counteracting the fat in the recipe. Some Asian recipes also use chemical leaveners, but many list it as an optional ingredient or omit it completely.
I prefer not to use any chemical leaveners in my chiffons. Chemical leaveners don’t create any new air pockets — they just expand existing ones. So while adding baking powder can help with lift, it will just increase the size of the bubbles we’ve already made in our meringue. I think using baking powder results in a more uneven crumb with bigger holes scattered throughout the cake, so I skip it.
Also, no amount of chemical leavener can save a cake that is folded poorly. So feel free to use baking powder if you like, but it is not necessary to bake a beautiful chiffon.
Tang mian (cooked dough): I’m not sure when or where the tang mian technique originated, but has been popular in Asian baking circles for quite some time. In this process, the flour is “cooked” with heated (~160-175F) fat before getting mixed with other ingredients. The idea is that pre-coating the flour with fat limits gluten formation, allows for a larger amount of liquid in the cake formula, and yields an extra fluffy and cottony-textured cake that stays moist for longer. (Sort of like tangzhong, but for cake.)
Based on my (limited) experience with this technique (I use it in my paper wrapped sponge cake recipe and have played around with it here and there), I think it’s worth trying but not absolutely essential for a cottony and moist sponge. I’d say that a water bath bake more noticeably impacts the overall texture of a chiffon.
I would like to explore using tang mian in cakes that include ingredients that can dry out the texture or deflate meringue, like cocoa powder or matcha. I think this technique could make these ingredients easier to incorporate while also amplifying those additions by essentially blooming them in fat. Just thinking aloud — will report back once I’ve experimented more!
Other chiffon tips
Meringue peak stage: Depending on the recipe I’m using, I will beat my meringue anywhere from medium-soft peaks to medium-firm peaks. A meringue beat to fully stiff peaks is difficult to incorporate into the rest of the batter without deflation, resulting in less volume and a drier texture overall. It can also cause a lot of cracking on the cake’s surface — no biggie if you’re baking in a tube pan where the bottom of the cake ends up being the top, but not ideal for water-bath chiffons or cakes baked in regular round pans. It’s better to err on the side of underbeating, as you’ll still be working the whites during the folding process. As noted above, beating on a lower speed overall helps create a more stable meringue no matter what peak stage you want, and makes overbeating less likely.
Folding: I like to use a large, wide bowl and a balloon whisk to do the majority of my folding. For chiffons, I typically whisk a small amount of meringue into the yolk batter to loosen it up, then scrape the yolk batter over the remaining meringue. (This helps prevent a layer of thick yolk batter stuck on the bottom of your bowl.) I use a whisk to fold together the batter 80% of the way, then finish up with a flexible spatula. Here’s a real-time visual of my process (starting from when the yolk batter is added to the remaining meringue):
Baking pans: Dry-baked chiffons are most often baked in ungreased two-piece tube or angel food pans, then cooled upside down to keep the crumb from compressing. Do not use nonstick pans; the light batter needs to cling to the sides of the pan as it rises. I’ve also had success baking them in regular cake pans (for a 10” tube recipe, two 8x3 or three 8x2 round pans; or two half sheet pans). In these situations, usually line the bottoms with parchment but keep the sides ungreased; then cool them upside down by carefully balancing the edges of the pan on a trio of cans of the same height. If baking a flat sheet, I do not cool upside down.
On the contrary, water-bath chiffons are baked in regular cake pans and unmolded right after baking to prevent wrinkling and excessive shrinkage.
Cutting: To preserve chiffon’s fluffy, soft crumb, use a serrated knife in a sawing motion to cut.
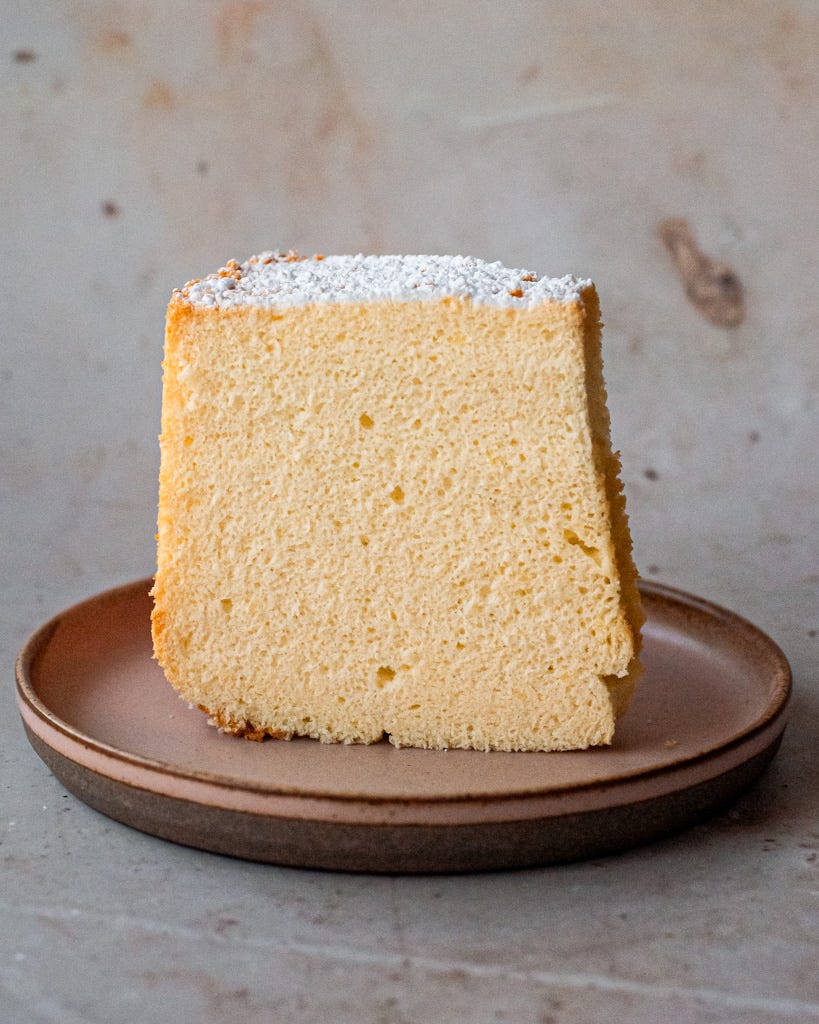
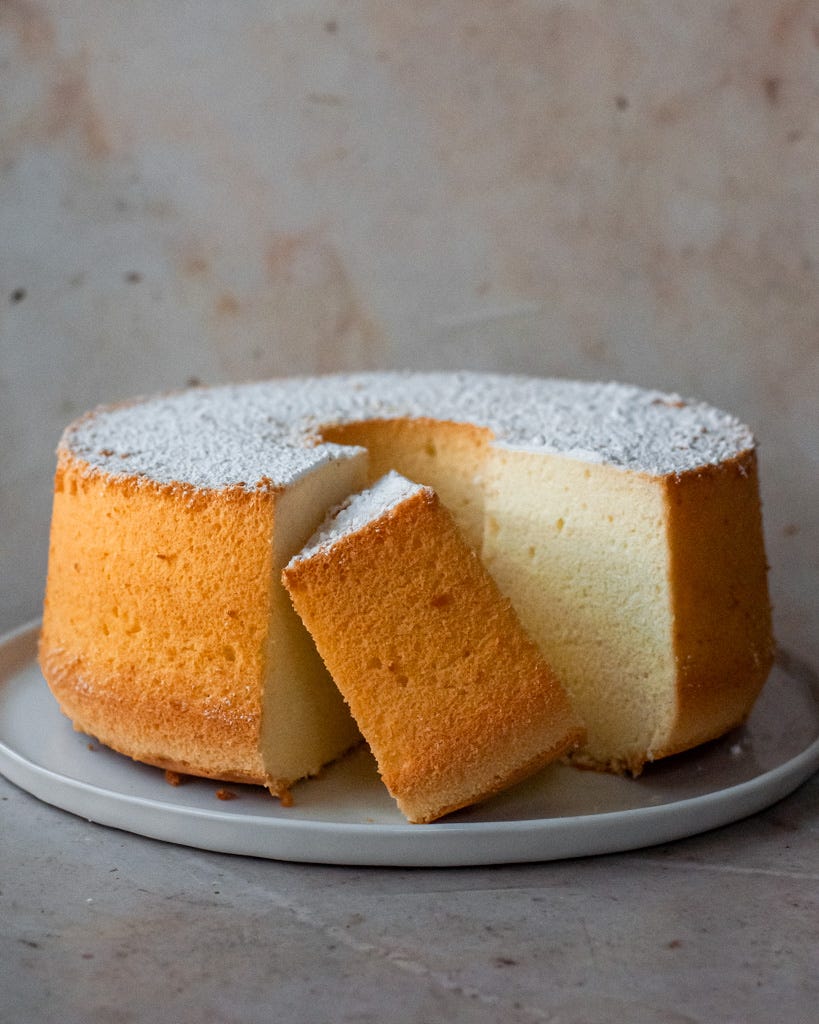
I came up with this cream cheese chiffon cake because I was craving a tall, fluffy cake but really wanted to use up a partial block of cream cheese lurking in the fridge. It’s based on the OG, my Mom’s Sponge Cake (from my cookbook), but here cream cheese and milk replaces some of the eggs and fat. You can’t specifically taste the cream cheese (if you want to amp up the tanginess you could try adding some lemon zest or oil), but it helps gives this cake a lovely tender crumb.
Although you’ll be warming the cream cheese over a bain-marie, it does incorporate with the sugar and milk more easily if it’s softened. If you forget to take it out of the fridge, a brief zap in the microwave should do the trick.
Cream Cheese Chiffon Cake
Makes one 10” tube cake
Ingredients:
160g full-fat cream cheese, softened
225g granulated (preferably superfine/caster) sugar, divided
90g whole milk
70g neutral oil (such as grapeseed or canola)
3/4 tsp kosher salt
2 tsp vanilla extract
8 large eggs (58-60g in-shell weight), separated and cold
175g cake flour, sifted
1/4 tsp cream of tartar
Icing sugar, for garnish
Method:
Preheat oven to 325°F (175°C) with a rack in the lower third.
In a heat-safe bowl set over an inch of gently simmering water, combine the cream cheese, 100g sugar, and milk. Heat until melted and smooth, whisking frequently. Remove from the heat. If there are any lumps, strain into a clean bowl. Let cool for a couple minutes.
Whisk in the oil, salt, and vanilla, and egg yolks until smooth. Sift in the flour in two batches, whisking until smooth after each addition.
In the bowl of a stand mixer fitted with the whisk attachment, beat the egg whites and cream of tartar on medium-low until foamy. Increase the speed to medium. When the whites reach soft peak stage, slowly add the remaining 125g sugar a spoonful at a time. Once all the sugar has been added, continue whipping on medium speed until the meringue is glossy and holds medium-firm peaks. Scrape the meringue into a wide mixing bowl to facilitate folding.
Add a large scoop of meringue to the yolk batter and fold it in using a balloon whisk. Scrape the yolk batter over the remaining meringue. Use a whisk to fold the batters together carefully but firmly. When a few streaks of white remain, switch to a flexible spatula and continue folding until the batter is smooth and uniform in color, taking care not to overmix. Be sure to scoop all the way down to the bottom of the bowl to make sure no denser batter is hanging out on the bottom.
Pour the batter into an ungreased aluminum 10-inch (25-cm) tube pan. (Don’t use a non-stick pan as this style of cake needs to cling to the sides to rise.) Tap the pan firmly on the counter a couple times, then run a skewer or chopstick through the batter to pop any large air bubbles.
Bake for 50 to 60 minutes or until the cake is well browned and a skewer inserted near the center comes out clean. Do not open the oven for at least 45 minutes or the delicate cake may fall.
Invert the pan to cool completely (if your pan doesn’t have feet, you can insert a heavy bottle through the center). Once cool, slide an offset spatula around the edges to loosen, remove the insert, then slide the spatula around the bottom. Flip the cake onto a serving platter.
Right before serving, dust with icing sugar. Use a serrated knife to slice the cake into wedges. Store leftovers in an airtight container for up to 3 days.
Want even more fluff? Try another version of chiffon cake that incorporates both tang mian and water bath methods for a super soft and jiggly texture.
Two important things to watch out for with water bath chiffons: first, only beat the meringue to medium peaks. If beat too stiffly the whites won’t have room to expand in the oven and you’re more likely to end up with cracks in the top. Second, we want a low and gentle bake to control how fast the cake expands. Too high a temperature can also lead to cracking. But in the end, a cracked cake will still taste delicious so enjoy the process (and the cake)!
Keep reading with a 7-day free trial
Subscribe to Cook Til Delicious to keep reading this post and get 7 days of free access to the full post archives.


